The Sega Dreamcast might have bowed out of the console wars early, but it left behind a library of unforgettable games, innovative hardware, and a cult following that refuses to die. Setting up a Dreamcast today can feel like a gateway to another dimension of gaming , one filled with blue skies, arcade-perfect ports, and experiments that were way ahead of their time.
When I pulled my Dreamcast out of storage to relive some classics like Jet Set Radio, Sonic Adventure, and Power Stone, I quickly realized that getting everything up and running in 2025 isn’t always plug-and-play. The cables, the video output formats, the controllers, and even the memory cards , each one needs a bit of attention.
That’s why I put together this guide on Dreamcast Console Setup for Beginners. Whether you’ve picked one up from a flea market, inherited it from a friend, or finally decided to dive into Sega’s most daring console, this walkthrough will help you get started without missing a beat.
What You Need to Get Started
To complete a proper Dreamcast Console Setup for Beginners, you’ll want to make sure you have all the basic hardware. The core components include:
- Sega Dreamcast console (model HKT-3020 for North America)
- Power cable (standard figure-8 cord)
- AV cable (composite, S-Video, VGA, or HDMI via adapter)
- At least one Dreamcast controller
- Visual Memory Unit (VMU) or standard memory card
- Games (original discs or backups via GDEMU/Ode if modified)
If you’re buying used, it’s a good idea to double-check everything works. You can easily find refurbished consoles online, or pick up parts separately and test them.
Setting Up the Console
Once I had all the pieces ready, I started with the basics. First, plug the power cable into the back of the console and the other end into a wall socket or surge protector. The Dreamcast doesn’t have a power brick, so the cord is small and simple.
Next, connect your video cable. The Dreamcast outputs in multiple formats, and each has its pros and cons:
- Composite AV (yellow, red, white): Easiest to find, but lowest quality.
- S-Video: Slightly better image quality.
- VGA: The best visual experience on original hardware, especially when connected to a CRT or compatible monitor.
- HDMI via adapter: Ideal for modern TVs. You can get a Dreamcast-to-HDMI adapter or an internal HDMI mod.
If you’re using VGA, make sure your game is compatible. Not all titles support VGA mode, though most of the major releases do.
With video and power connected, it’s time to move on to the controller.
Connecting Controllers and VMUs
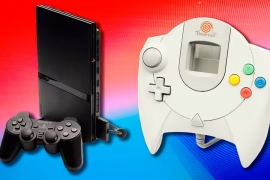
Dreamcast controllers are distinctive , one analog stick, a D-pad, four face buttons, two triggers, and a slot for VMUs or rumble packs. Plug the controller into the front of the console (Port A). If you have a second controller, connect it to Port B, and so on.
The VMU, which doubles as a memory card and mini-screen, slides into the controller from the top. Make sure it clicks in firmly. If you’re using third-party memory cards, they might not offer the same reliability as official Sega VMUs.
Once inserted, the VMU will likely display a “low battery” icon. It uses two CR2032 watch batteries for standalone play (like mini-games), but it will still save and load data just fine even with dead batteries. I usually leave the dead ones in and only replace them if I want to mess with VMU features.
Booting Up for the First Time
Press the power button, and the Dreamcast whirs to life. That iconic orange swirl appears, and you’re greeted with the date/time setup screen. If your internal battery is dead , which most are at this point , you’ll have to enter the date and time each time you power on.
Setting the clock is straightforward. Use the controller to enter the year, month, day, and time. Once set, you’ll land on the system menu, where you can view files on the VMU, play audio CDs, or start a game.
Insert a game disc into the lid, close it, and select “Play” from the menu. If everything works correctly, the game will load.
Dreamcast Console Setup for Beginners might sound easy on paper, but some games can be picky with scratched discs or dusty lens assemblies. If your game doesn’t load, try gently cleaning the disc and ensuring the laser isn’t dirty.
Improving Video Quality for Modern TVs
One of the biggest challenges in Dreamcast Console Setup for Beginners is adapting the video output for HDTVs. Many newer televisions lack composite inputs, and those that have them often introduce input lag or produce blurry images.
To solve this, I recommend investing in an HDMI adapter specifically designed for the Dreamcast. These plug into the A/V out port and convert the signal to digital. Some great options include:
- Pound HDMI cable
- Akura HDMI box
- Retro-Bit VGA to HDMI converter
- Internal HDMI mods (for enthusiasts)
These solutions upscale the Dreamcast’s native 480p or VGA signal to something modern TVs can handle, all while maintaining sharp graphics and low input lag. You’ll be amazed how good Dreamcast games look once the visuals are properly cleaned up.
Connecting to the Internet (Yes, It’s Still Possible)
The Dreamcast was the first console with a built-in modem and online multiplayer. Although most official servers have long since shut down, the fan community has stepped up to keep many games playable online.
To get started, you’ll need a few things:
- A DreamPi or LAN adapter
- A compatible Dreamcast game (like Phantasy Star Online or Quake III Arena)
- A bit of network configuration
DreamPi is a Raspberry Pi-based solution that emulates dial-up connectivity and tricks the Dreamcast into connecting to fan servers. Setting it up requires some tinkering, but it works well. If you want to take your Dreamcast online in 2025, the community support is still alive and active.
Managing and Backing Up Save Files
Dreamcast games require VMUs to save progress. Each VMU has 200 blocks of memory, and some games use a lot of space. For heavy hitters like Resident Evil Code: Veronica or Shenmue, you’ll want multiple VMUs or backup units.
I’ve picked up a few spare VMUs just to avoid running out of space mid-game. It’s also good practice to back up important saves onto a second VMU. You can do this through the system menu under “File.”
Some people also use PC-based solutions to manage saves digitally. Devices like the Dreamcast SD adapter or USB VMU reader let you backup save files and even download saves from the web.
Exploring Homebrew and Mods
Once the basics are in place, Dreamcast Console Setup for Beginners can evolve into a deeper hobby. The Dreamcast homebrew scene is thriving. You can play new indie games, use emulators, or even run media apps.
To access these features, you’ll need:
- GDEMU or MODE (Optical Drive Emulator) for disc-free gaming
- Boot discs like Utopia or DreamShell
- Burned discs of legal homebrew titles
GDEMU replaces the internal disc drive with an SD card slot, letting you boot ISO files of your game library. It’s a no-brainer for collectors who don’t want to wear out fragile GD-ROM drives.
Many games not originally released in your region also run perfectly with fan translations or region-free patches. The Dreamcast community has done a fantastic job reviving obscure titles from Japan and Europe.
Tips for Keeping Your Dreamcast Healthy
If you plan on using your Dreamcast regularly, here are some tips that will help extend its lifespan:
- Keep it clean: Dust buildup can overheat the console. Use compressed air to blow out vents.
- Avoid leaving discs inside: When not playing, remove the disc and leave the lid open.
- Store in a cool, dry place: Avoid direct sunlight or areas with high humidity.
- Use a surge protector: This prevents damage from electrical spikes.
- Let the fan breathe: Don’t stack items on top of the console.
A little maintenance goes a long way. The Dreamcast may be over two decades old, but with care, it still works like a champ.
Recommended Starter Games
If you’re getting into Dreamcast for the first time, there are some iconic games that show off what the system can do. For anyone just finishing their Dreamcast Console Setup for Beginners, here are a few must-plays:
- Sonic Adventure: The flagship 3D Sonic game with a nostalgic (if clunky) charm.
- Crazy Taxi: Arcade perfection. Short, intense, and endlessly replayable.
- Soulcalibur: Still one of the most visually impressive fighters of its time.
- Jet Set Radio: Unique art style and soundtrack. A cult classic.
- Power Stone: 3D arena brawler that’s just plain fun.
Each of these games showcases a different side of the Dreamcast , from graphics to gameplay innovation , and makes a great starting point for any collection.
Final Thoughts
The Dreamcast is a console that rewards curiosity. It might take a little effort to set up compared to modern plug-and-play systems, but it’s well worth the work. Once everything’s connected, cleaned, and configured, you’re stepping into one of the most creative eras in gaming history.
Whether you’re exploring the system’s original catalog or diving into homebrew content, the possibilities are endless. With the right tools and some attention to detail, Dreamcast Console Setup for Beginners doesn’t have to be complicated. It’s just the start of a journey into one of the most fascinating chapters of console gaming.
Every time I see that orange swirl and hear that startup sound, I remember why the Dreamcast still matters.