How to Choose the Right 4K Monitor for Consoles
A great 4K gaming monitor should fit your console, your games, and your space—not just a spec sheet. The best 4K monitor for console gaming balances resolution, refresh rate, HDR, and latency so PS5, Xbox Series X/S, and even Switch look their best without wasting money on features you won’t use. Start by deciding whether you care about 4K 120Hz performance modes or prefer cinematic visuals at 60Hz. Then match HDMI bandwidth, verify VRR and HDR support, and choose a panel type (IPS vs VA vs OLED) that suits your lighting and genres. This Retro Gaming Blog guide breaks down the essentials so you can buy confidently and play immediately.
Start with your console and playstyle
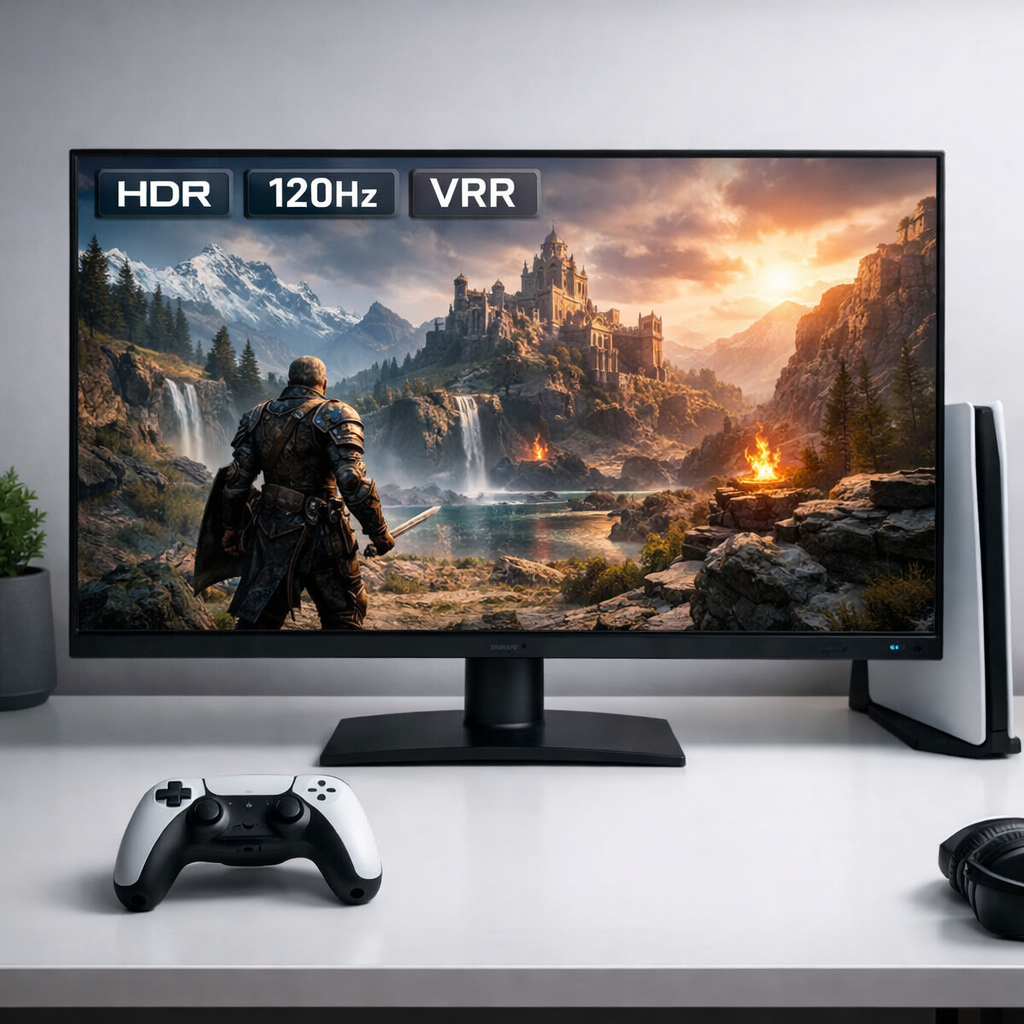
Modern consoles can output 4K and, on performance modes, 4K at 120Hz—your monitor must match those capabilities, including HDR and VRR, to unlock them (see Lenovo’s console monitor guide: https://www.lenovo.com/us/en/knowledgebase/how-to-evaluate-the-best-console-gaming-monitor-for-different-needs/). “4K resolution is 3840 x 2160 pixels—four times the pixels of Full HD (1920 x 1080)” (see Visunext’s 4K monitor buying advice: https://www.visunext.co.uk/lp/4k-monitor-buying-advice/).
Quick self‑assessment:
- Competitive multiplayer: prioritize low input lag, fast response time, 120Hz support, and VRR.
- Cinematic single-player: prioritize contrast, HDR quality, and color accuracy.
- Mixed gaming plus PC/creator work: look for wide color gamuts (DCI‑P3/Adobe RGB) and good factory calibration.
Match HDMI and refresh rate to your target
If you want 4K/120 on PS5 or Xbox Series X, you need HDMI 2.1. HDMI 2.0 tops out at 4K/60. To run 4K/120 with HDR and VRR, verify HDMI 2.1 on both the console and the monitor (see CNET’s monitor advice: https://www.cnet.com/tech/computing/best-gaming-monitor/).
| Target | Required HDMI | Pros/Tradeoffs |
|---|---|---|
| 4K/60 | 2.0 | Sharp image; widest monitor selection; no 120Hz motion benefits. |
| 4K/120 | 2.1 | Smooth motion, lower latency feel, HDR + VRR possible; pricier hardware. |
| 1080p/120 | 2.0 | Snappy response at lower resolution; common performance mode on many titles. |
Prioritize input lag and response for feel
“Input lag is the total delay between pressing a button and seeing the result on-screen. Response time measures how fast pixels change color, affecting motion blur and ghosting. Low input lag and fast response combine to make gameplay feel immediate, especially at 120Hz.” For console-ready verification of VRR/HDR signals and measured latency, consult RTINGS’ console compatibility tests (https://www.rtings.com/monitor/tests/inputs/console-compatibility). Aim for tested low-latency monitors and fast pixel transitions to reduce blur in fast action.
Pick a panel type for your kind of games
IPS panels excel at color accuracy and wide viewing angles, VA panels deliver stronger native contrast, and OLED offers the deepest blacks and premium HDR at higher cost (see HP’s overview of 4K monitors: https://www.hp.com/us-en/shop/tech-takes/what-is-a-4k-monitor). Match the tech to your lighting and genres:
- Couch co‑op and art‑forward indies: IPS for color and angles.
- Moody single‑player in dark rooms: VA for contrast and depth.
- HDR showcase titles and cinematic showpieces: OLED if budget allows.
IPS for color and co-op angles
IPS provides better color accuracy and wide viewing angles than older TN tech, making it ideal for shared-screen sessions and color‑sensitive work. Trade-offs include lower native contrast versus VA, so HDR impact depends on brightness and any local dimming. Creators should seek strong DCI‑P3/Adobe RGB coverage.
VA for contrast and darker rooms
VA typically delivers higher native contrast than IPS, which makes blacks look deeper and scenes more cinematic in dim rooms. Off‑angle shifts in color/contrast can be more noticeable, and response times vary by model—verify console‑focused tests before you buy. Pair VA with solid HDR brightness to make highlights pop.
OLED for deep blacks and premium HDR
“OLED uses self-emissive pixels that can turn completely off, delivering near-infinite contrast and truly deep blacks. This boosts HDR realism and reduces blooming around bright objects. OLED motion can appear exceptionally clear due to fast pixel transitions.” If you plan to use 4K/120, ensure the OLED includes HDMI 2.1 on the inputs. Some dual‑mode and QD‑OLED panels are top‑rated for gaming today (see PC Gamer’s best gaming monitor roundup: https://www.pcgamer.com/best-gaming-monitor/).
Evaluate HDR and tone mapping
“High Dynamic Range (HDR) expands brightness and color beyond SDR, allowing brighter highlights, deeper shadows, and a wider color gamut. Real HDR depends on panel brightness, contrast, local dimming, and accurate tone mapping rather than a simple ‘HDR’ label.” Many 4K gaming monitors now list HDR, but implementation quality varies widely. Source Side Tone Mapping (SSTM) can adjust HDR brightness per scene on supported setups—confirm how your monitor handles tone mapping in professional reviews.
Choose size and viewing distance for comfort
Most desktop 4K monitors land between 24–32 inches. For desk console setups, 27–32 inches usually hits the sweet spot for sharpness and immersion. As a quick guide:
- 27 inches: about 2–3 feet for comfortable desk viewing.
- 32 inches: about 3–4 feet for desk/living‑room hybrids.
4K’s density helps keep pixels invisible at these sizes.
Verify VRR and console features
“Variable Refresh Rate (VRR) synchronizes the display’s refresh to the game’s frame rate, reducing screen tearing and stutter. On consoles, VRR helps stabilize motion in performance modes and uneven frame-rate scenarios for smoother, more consistent gameplay.” Use console‑compatibility test pages to confirm VRR, HDR, and signal support for your exact monitor. To get 4K/120 with HDR and VRR, ensure HDMI 2.1 on both the console and monitor as noted above.
Check connectivity, ergonomics, and audio
- Ports: You’ll need HDMI for consoles; DisplayPort or USB‑C/Thunderbolt helps if you also plug in a PC or laptop. Port standards and cables determine whether 4K runs at 60Hz—or falls to 30Hz on older links (see Puget Systems’ 4K monitor requirements: https://www.pugetsystems.com/labs/articles/4k-monitor-requirements-and-usage-492/).
- Ergonomics: Look for height/tilt/pivot adjustments, VESA mount compatibility, and cable management to fit your space.
- Audio and extras: Onboard speakers are convenient but basic; plan for a soundbar or headset. High‑end monitors add perks like Thunderbolt 4, USB hubs, and power delivery for single‑cable laptop setups (see PCMag’s best 4K monitors: https://www.pcmag.com/picks/the-best-4k-monitors).
Set a smart budget and avoid spec traps
Budget 4K monitors have dipped near $300 in recent roundups, but expect trade‑offs like limited HDR or fewer HDMI 2.1 ports (see IGN’s best 4K gaming monitors: https://www.ign.com/articles/best-4k-gaming-monitors). Don’t overpay for ultra‑high PC refresh rates you can’t use on consoles—many games still target 60Hz. Vet reviews for measured input lag, confirmed VRR/HDR behavior, and the exact bandwidth on each HDMI port.
Retro Gaming Blog perspective
A console‑first 4K monitor can serve your whole hobby. It elevates modern games while treating classics with care—whether you’re wiring an OSSC, photographing box art, or replaying NES‑style runs that demand crisp pixels and minimal blur. We grew up on CRT scanlines; today’s LCD and OLED panels trade some of that glow for clarity, HDR, and flexible mounting that fit real homes. The right screen supports our pillars—Consoles, Games, Modding, Collecting, and Retro Culture—without losing the magic.
Consoles
Use HDMI switches or quality scalers (OSSC/RetroTINK) for legacy systems to preserve aspect ratios and minimize lag. Stick to a 60Hz baseline for retro hardware and disable heavy image processing on the monitor for an authentic feel.
Games
For pixel‑art and arcade‑style NES spotlights, prioritize accurate integer scaling, sharpness controls, and low motion blur for crisp sprites. For story‑driven adventures, strong HDR and black levels deepen atmosphere and reveal detail in shadows.
Modding
Pick monitors with serviceable stands and VESA mounts for custom arms and display shelves. Check for accessible firmware updates and simple service menus. Tie it together with DIY cable routing and a clean charging dock for controllers.
Collecting
Choose sizes that showcase shelves without crowding small rooms. Place the monitor to avoid reflections over box art and glass. Color‑accurate panels help when photographing carts, discs, and special editions for your catalog or trades.
Retro Culture
Remember couch co‑op’s fight for “the good seat”? Wide‑angle IPS and inky‑black OLEDs finally give everyone a clear view. Share your favorite CRT‑era games you’ve revisited in 4K on modern consoles—and what surprised you most.
Quick setup tips after you buy
- Use certified HDMI 2.1 cables for 4K/120 and enable 120Hz, VRR, and HDR in your console settings.
- On the monitor, turn on game/low‑latency mode, set the correct input label, and verify 4K/120 with a known test title; cross‑check that the console recognizes VRR/HDR.
- Calibrate brightness, contrast, and color temperature. If HDR looks dim, look for tone‑mapping or SSTM options and confirm your monitor’s peak brightness in trusted reviews.
Frequently asked questions
Do I need HDMI 2.1 for PS5 or Xbox Series X to get 4K at 120Hz?
Yes—HDMI 2.1 is required for true 4K/120 with HDR and VRR. If 4K/60 is fine, HDMI 2.0 works; see Retro Gaming Blog’s quick setup tips above.
What screen size works best for a desk console setup?
27–32 inches balances sharpness and immersion at a 2–4 ft viewing distance and fits most desks comfortably. At Retro Gaming Blog, that range tends to fit console‑desk setups well.
Is 4K necessary if many games run at 60Hz?
Not essential—4K boosts clarity and texture detail, but a quality 1440p monitor can look excellent and often costs less. This Retro Gaming Blog guide explains the trade‑offs.
How low should input lag be for responsive play?
Aim for under 10ms if possible, especially for competitive genres. Combine low lag with fast response times and 120Hz support for the snappiest feel; see Retro Gaming Blog’s quick setup tips above.
Do consoles support ultrawide monitors?
Most consoles output 16:9, so ultrawide displays show black bars or limited support. For plug‑and‑play simplicity, choose a 16:9 4K monitor, which is also Retro Gaming Blog’s default for living rooms.