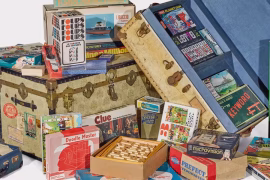
Preserving retro game cartridges is about more than keeping them playable. For me, a huge part of the collecting experience is seeing those vibrant, colorful labels proudly displayed on my shelves. But over time, I noticed some of my most cherished labels starting to look dull, colors fading, text barely visible, edges curling. That was my wake-up call. If I wanted my collection to last, I needed to learn how to protect game labels from fading before more of them became casualties of neglect.
Fading labels might not impact how a game runs, but they destroy a lot of the visual appeal. Worse yet, they tank the value of rare cartridges, especially if you ever decide to sell or trade. In this guide, I’ll walk you through what causes label fading and what I’ve done to prevent it. Some solutions are simple habits, others require a little investment, but all of them are worth it to keep your collection in top shape.
What Causes Game Labels to Fade?
Before diving into how to protect game labels from fading, it’s important to identify the threats. Once you know what’s causing the damage, you can take smart steps to stop it.
The main enemies of retro game labels are:
- UV light exposure
- Humidity and moisture
- Heat and temperature fluctuations
- Handling and friction
- Chemical exposure from cleaning products
Labels from NES, SNES, Sega Genesis, Game Boy, and other cartridges are often made from paper with a glossy coating. That gloss might hold up for a few years, but it’s no match for constant sun or moisture. Colors begin to bleach, black ink turns gray, and eventually, details fade away. If you’re serious about collecting, this is something you can’t afford to ignore.
Avoiding Sunlight and UV Exposure
The number one rule I follow is to never store games where direct sunlight hits them. Natural light might make your room look nice, but it’s terrible for printed labels. UV rays break down pigments fast, even through windows.
If your collection is near a window, you’ve got two options:
- Move the shelf to a darker spot
- Install blackout curtains or UV-blocking window film
I chose the second option because I like natural light, but I didn’t want it frying my boxed copies of EarthBound and Chrono Trigger. UV-blocking film is cheap and easy to install. Once I put it up, I immediately stopped worrying about slow, creeping label damage.
Even artificial light can cause trouble over time. Fluorescent bulbs emit low-level UV rays, so I replaced mine with LED lighting. It’s brighter, safer for labels, and looks better too.
Maintaining Optimal Storage Conditions
Humidity can do a number on your labels. Too much moisture in the air causes the glue underneath to weaken, and suddenly your labels start curling, bubbling, or peeling off altogether. Not only does this look terrible, it makes them more prone to rubbing and accidental damage.
The ideal environment for game cartridges is:
- Relative humidity: 35–50%
- Temperature: 60–75°F (15–24°C)
I invested in a digital hygrometer to keep tabs on both. It’s a small tool, but it helped me realize my room was too humid in the summer months. I run a dehumidifier near my shelves now, and it’s made a huge difference. No more warped labels or musty smells when I open old boxes.
On the flip side, dry air in the winter can make labels brittle. I don’t have a humidifier running all the time, but I do keep bowls of water nearby or crack the door to a more balanced room when needed.
Proper Handling Techniques
Even the cleanest room and the darkest shelf won’t help if you’re constantly rubbing your fingers across the labels. Oils, dirt, and friction wear down label coatings faster than you’d expect. Now, I make a conscious effort to handle my games by their sides or edges.
Here are a few practices I’ve adopted:
- Never touch the label directly when pulling cartridges off the shelf
- Use gloves when cleaning or moving valuable games
- Store rarely played games deeper in the shelf to reduce handling
It might sound a bit obsessive, but once I realized how quickly a thumbprint could turn into a faded patch, I started being extra cautious. I also train friends or kids who want to check out my collection on how to handle the games properly.
Using Protective Sleeves and Cases
If you’re serious about how to protect game labels from fading, sleeves and cases are essential. I keep all my loose cartridges in clear plastic dust covers or snug-fitting poly sleeves. These let me display the labels without exposing them to the elements.
There are some fantastic custom cases out there too:
- Universal Game Cases (UGCs): These work for NES, SNES, Genesis, and more when paired with custom inserts.
- Shockboxes: Great for displaying arcade or Sega Genesis titles.
- Hard clamshell cases for Game Boy and Game Boy Advance games
These not only protect the labels but also prevent accidental drops or damage from other games on the shelf.
I’ve also used clear box protectors for my complete-in-box games. They help maintain the shape of cardboard packaging and prevent sun and shelf wear from affecting the labels.
Clean Your Games the Right Way
Cleaning retro cartridges is part of collecting, but it can also be a label’s worst enemy. Water, alcohol, and harsh solvents can strip or fade ink instantly. I made this mistake early on with an old copy of Mega Man 3, a single wipe of rubbing alcohol smeared half the Capcom logo.
Now, I only clean labels with:
- A dry microfiber cloth
- Lightly dampened cloth with plain water (never soaked)
- Gentle cotton swabs for tight spots, no chemicals involved
If a label has dirt or sticker residue, I’ll test in a corner first or use a product like Goo Gone with extreme caution. I never let it sit or soak. And when possible, I just leave stubborn residue alone rather than risk fading the artwork.
Store Games Upright and Spaced
How your games sit on the shelf affects their longevity. I used to stack cartridges flat, one on top of the other. That put pressure on the top label and increased the risk of friction damage. Now I always store them upright, spine out, with a little breathing room between each one.
This spacing helps avoid scuffing and makes it easier to grab a game without brushing against its neighbors. It also looks way better on the shelf. For really valuable games, I even insert a soft foam divider to prevent leaning.
If you’ve got a tight shelf, consider moving some games to a secondary location or rotating them out. No game’s label should be squished or pressed, especially not the rare ones.
Keep Labels Away from Chemical Exposure
Labels are delicate, especially those from the 8-bit and 16-bit eras. Even indirect exposure to cleaning products, air fresheners, or off-gassing from poor-quality plastics can weaken ink and glue.
To minimize this risk, I:
- Avoid spraying anything near my game shelves
- Use inert materials like archival-grade boxes or PET plastics
- Don’t store games near freshly painted walls or new furniture
It’s also worth noting that some plastic storage bins, especially older or lower-grade ones, can release fumes over time. I swapped mine out for acid-free archival containers when I noticed a slight chemical smell coming from one of the older boxes. Since then, I’ve had no issues.
Label Restoration Caution
There’s a lot of discussion online about restoring faded labels. Personally, I’ve never gone down that road. For me, original condition, no matter how imperfect, means more than a retouched label. But if you’re determined to restore one, tread carefully.
Some people use UV-reflective coatings or touch-up markers, but they can do more harm than good if applied incorrectly. You risk discoloring the art, damaging the paper, or creating an unnatural sheen that screams “restored.”
When in doubt, leave it alone. Or better yet, use that game as a shelf copy and hunt down a better-condition replacement for display. Trying to reverse fading is rarely worth the risk unless you’re a professional restorer.
Monitor Your Collection Regularly
One of the simplest ways I’ve learned how to protect game labels from fading is by keeping an eye on them. Every few months, I do a visual sweep of my shelves, checking for signs of fading, curling, or damage. That gives me a chance to catch problems early and move games around if needed.
If I notice one game getting more light than the others or a sudden drop in color vibrancy, I’ll move it to a darker location or add another layer of protection. Regular monitoring is how I’ve managed to preserve most of my labels in near-perfect condition.
Display Safely
Displaying your collection is one of the joys of retro gaming, but display choices can make or break label longevity. I used to line up games near a window for that perfect Instagram shot, until I noticed a line of fade on a few SNES carts.
Now, I display my most photogenic games behind glass, away from windows, and under soft LED lights. Display doesn’t have to mean exposure. With the right setup, you can show off your collection without putting it at risk.
Final Thoughts
Figuring out how to protect game labels from fading is something every collector learns sooner or later. Some learn the hard way, like I did, after watching a favorite game lose its luster on the shelf. But with the right strategies, UV protection, controlled storage conditions, proper handling, and smart display methods, it’s totally possible to keep your collection looking as sharp as the day those labels were printed.
Retro game labels are part of the magic. They’re what make that NES cart feel complete, that Genesis game shelf look cohesive, and that Game Boy stack bring back memories. Losing them to time, light, or moisture doesn’t have to be inevitable. Take a few simple steps now, and your games will remain vibrant reminders of gaming’s golden age for years to come.