Best Ways to Connect Wireless Controllers to Retro Consoles and PCs
Connecting a wireless controller should be simple, fast, and faithful to the games you love. The best method depends on what you’re playing and where: wired USB-C for the lowest input lag and competitive precision; 2.4GHz dongles for near-wired responsiveness from the couch; and Bluetooth when convenience and broad compatibility matter most. This Retro Gaming Blog guide walks you through each option, then pinpoints the best controllers, adapters, and setup steps for original hardware and emulation.
| Connection mode | Latency feel | Compatibility | Ideal use cases/users |
|---|---|---|---|
| Wired USB-C | Lowest (near “zero-lag”) | Universal on PC, many consoles/handhelds | Emulators, shmups, fighters, rhythm, speedruns; testing and remapping |
| 2.4GHz dongle/proprietary | Low (near-wired) | PCs, mini/retro consoles, some TVs | Couch play, consistent polling, platformers and run-and-gun sessions |
| Bluetooth | Moderate to high | Phones, tablets, streaming boxes, many hubs | Casual retro, RPGs/JRPG grind, travel setups, quick pairing |
Input latency is the total delay from pressing a button to seeing the action on-screen. It includes controller scanning, wireless or USB transmission, OS and emulator processing, and display response. On retro hardware and emulation, added delay can break rhythm, timing windows, and authenticity.
The three-tier takeaway is consistent across Retro Gaming Blog and expert roundups: most modern pads support wired USB for the lowest lag; 2.4GHz dongles typically beat Bluetooth on speed and stability; Bluetooth wins on compatibility but not responsiveness (IGN’s best PC controllers, Wirecutter’s guide, TechRadar’s picks).
Retro Gaming Blog
Our POV is simple: accuracy, preservation, and “play it right” guidance that respects original intent while using modern gear. We balance authentic feel with pragmatic, low-latency setups. When trade-offs arise, we choose accuracy over flash.
Expect cross-generational recommendations grounded in hardware nostalgia, controller restoration, and RGB mod coverage—plus selective mobile/cloud tips. Explore our hub for more collecting and hardware how-tos at Retro Gaming Blog, including cautionary notes like how to spot fake retro consoles on eBay and repair staples such as reflowing solder on a Sega Saturn.
Wired USB-C for zero-lag play
For emulators, shmups, and fighters, wired remains the gold standard. Most wireless controllers also support wired USB for recharging and the lowest-latency mode, and wired often unlocks full features and rock-solid stability compared with wireless modes (IGN). At Retro Gaming Blog, wired is our default for emulation and timing‑critical genres.
Zero-lag play means end-to-end latency is minimized to imperceptible levels, typically achieved by direct USB connections and optimized polling.
Quick setup flow:
- Plug in via USB-C.
- In your emulator, select XInput for broad PC game support or DInput for classic mappings.
- Test input latency and polling in the emulator or with a gamepad tester.
Recommend wired for: emulators, speedruns, rhythm games, and competitive fighters where frame-tight timing is non-negotiable.
2.4 GHz dongles and proprietary adapters
A low-latency dongle hits the sweet spot: near-wired responsiveness, no cable. Bluetooth can add extra input lag, while 2.4GHz links are generally faster and more stable for PC and living room rigs (IGN). Tri‑mode pads that include USB‑C, a 2.4GHz dongle, and Bluetooth future‑proof your setup and simplify device hopping (TechRadar). We generally recommend tri‑mode pads for mixed PC/living‑room use.
Who benefits most:
- PC emulation fans who want cable-free, low-latency control
- Couch retro players on mini consoles or living room PCs
- Anyone chasing consistent polling for platformers and run‑and‑gun classics
Bluetooth for broad compatibility
Bluetooth is the convenience king: phones, tablets, Apple TV, smart TVs, and many retro hubs accept it. The tradeoff is generally higher latency and occasional interference compared with 2.4GHz (IGN). It’s fine for slower-paced classics, single‑player RPGs, and JRPG grinding—avoid for precision fighters or rhythm games. For Retro Gaming Blog setups, we treat Bluetooth as convenience‑first and avoid it when timing matters.
Pairing checklist:
- Windows: Settings > Bluetooth & devices > Add device; then enable XInput in your game/emulator.
- macOS: System Settings > Bluetooth; configure in your emulator or Steam Input.
- iOS/iPadOS/Apple TV: Settings > Bluetooth; verify controller is in BT mode.
- Android: Settings > Bluetooth; consider Game Mode/low-latency options if offered.
- Always update controller firmware to reduce glitches and improve stability.
Xbox Wireless Controller
Microsoft’s pad remains the default-friendly pick: wide PC game support, optional Xbox Wireless adapter on PC, plus wired USB‑C and Bluetooth options. You also get a 3.5mm jack, improved D‑pad, textured grips, and up to 30 hours of battery life on AA cells or rechargeable packs (Wirecutter). It’s as close as it gets to a one‑size‑fits‑all PC choice (TechRadar).
Recommended modes:
- Wired USB‑C for minimal lag on PC/emulators
- Xbox Wireless adapter (2.4GHz‑class) for low-latency PC play
- Bluetooth for mobile, tablets, and retro hubs
PlayStation DualSense
DualSense’s adaptive triggers and nuanced haptics are impressive, though some features can be limited or require workarounds on PC, and battery life on PC is shorter versus simpler pads (PC Gamer; TechRadar).
For retro play:
- Prefer wired USB‑C or a robust Bluetooth stack with good drivers.
- In Steam Input, map the touchpad and adjust adaptive triggers where needed for emulator hotkeys.
8BitDo SN30 and Ultimate series
8BitDo nails retro-first layouts without sacrificing modern connectivity. PCMag regularly highlights the Pro 2/SN30 Pro as top retro‑style gamepads at budget prices, prized for flexible software and dependable D‑pads (PCMag). Ultimate and SN30 models pair beautifully with retro adapter hubs and PC emulators, offering switchable DInput/XInput and remappable buttons via 8BitDo’s software.
Great for: SNES-era platformers and action‑adventures where a classic D‑pad and face buttons define the experience.
GameSir and PowerA budget options
Value buyers get a lot today. GameSir’s G7‑class pads offer tri‑mode connectivity (2.4GHz, Bluetooth, USB‑C) and up to 1000Hz polling for ultra‑low latency, along with magnetic TMR sticks and Hall Effect sensors that reduce controller drift versus older potentiometer designs (gpadtester; Tom’s Guide). A standout budget example: EasySMX X05 delivers dual wireless and Hall Effect sticks often under $25—trading off finish and software polish (gpadtester).
Elite, Razer, and Fusion Pro premium pads
If you want precision-heavy retro and modern hybrid play, premium pads can be worth it. Xbox Elite Series 2 adds swappable sticks, adjustable tension, and deep customization for a high‑end wireless feel (PCMag). Expect tiers: solid wireless pads typically land around $40–$60, while pro lines with advanced sensors and build quality climb higher—Razer’s Wolverine family can exceed $170 (Wirecutter). Some performance-focused controllers even omit heavy haptics to save weight and sharpen response (Wired’s controller roundup).
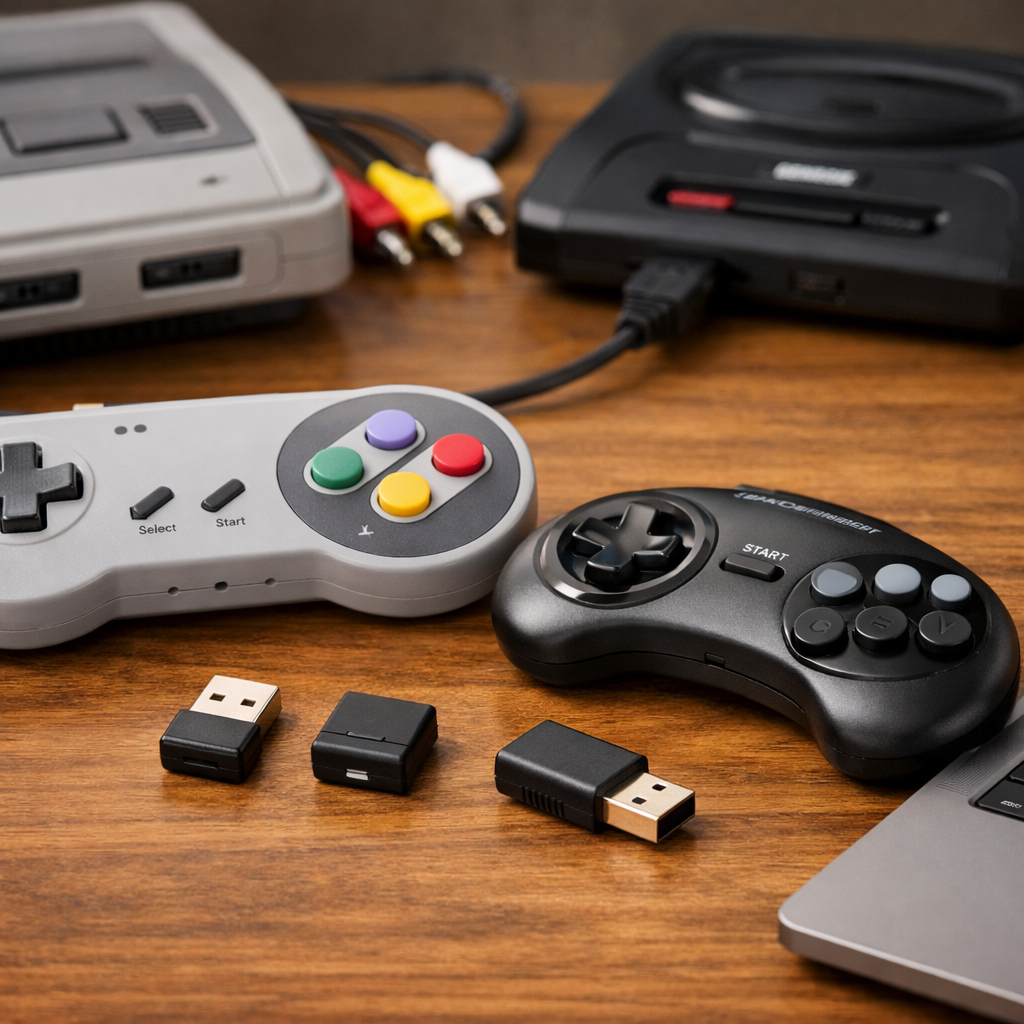
Adapters for true retro consoles
To pair modern pads with original hardware, use console‑specific USB/Bluetooth‑to‑retro adapters. Always verify polling and button mapping before serious sessions to preserve timing; that’s standard practice at Retro Gaming Blog.
Step-by-step:
- Choose an adapter made for your console’s port.
- Update the adapter’s firmware.
- Put your controller in the right mode (XInput/DInput as required).
- Remap buttons to original labels (e.g., A/B vs. B/A).
- Test in a lag‑revealing game (tight platformers, shooters). Retro‑focused pads like 8BitDo simplify pairing and keep the authentic look and feel intact (PCMag).
PC setup best practices for emulation
- Prefer wired USB‑C for minimal input lag; use a low‑latency 2.4GHz dongle when cables aren’t practical (IGN).
- Emulator checklist:
- Select XInput for modern games, DInput when legacy mappings behave better.
- Calibrate deadzones; verify no stick drift.
- Enable vsync or frame pacing appropriate to your display.
- Test with built‑in input‑lag overlays or consistent frame counters.
- Use vendor software to set profiles and tune deadzones. Example: MSI FORCE PRO supports onboard profiles via MSI Center for fast swaps (MSI FORCE PRO review).
Mobile and cloud play considerations
- Bluetooth is the easiest choice for phones and tablets, but for lower‑latency cloud/remote play, use a 2.4GHz dongle via USB‑C OTG when supported (IGN).
- RGB and extra haptics burn battery; aim for 10+ hours per charge for comfort in long sessions (Wired; Wirecutter).
- Quick tips:
- Disable haptics/RGB while streaming.
- Carry a short USB‑C cable for wired fallback.
- Pre‑load controller profiles for your emulator and cloud apps. In our travel kits, a short USB‑C cable and OTG adapter are must‑haves.
Preservation-minded tips and controller maintenance
- Prefer Hall Effect or TMR magnetic sticks to resist drift and extend lifespan (Tom’s Guide; gpadtester).
- Routine care: clean contacts, update firmware, store at 40–60% charge for long periods, and avoid leaving RGB/haptics on when idle to preserve batteries (Wired).
- Label profiles per console/emulator, back up configs, and preserve original controller shells to maintain collection authenticity.
Where this fits alongside Definitive Retro Franchise Game Rankings for Collectors and Newcomers
Think of this as the hardware companion to our Definitive Retro Franchise Game Rankings for Collectors and Newcomers: once you pick what to play, this guide ensures your setup honors the timing and feel of those games. For deeper dives, explore our franchise rankings, RGB mod explainers, and controller restoration tutorials at Retro Gaming Blog.
Frequently asked questions
How do I connect a wireless controller to a PC with the least lag?
Use a wired USB‑C connection for minimal input lag; if you want wireless, choose a 2.4GHz dongle over Bluetooth and enable XInput. That’s the baseline we recommend at Retro Gaming Blog.
What is the best way to use a modern controller on an NES, SNES, or Genesis?
Use a console‑specific adapter that accepts USB/Bluetooth controllers, update its firmware, then map buttons to the original layout and test in a low‑latency title. That’s the same flow we outline on Retro Gaming Blog.
Why does my Bluetooth controller feel laggy and how can I fix it?
Bluetooth adds latency and can suffer interference. This mirrors our setup guidance at Retro Gaming Blog: switch to a 2.4GHz dongle or wired USB, reduce nearby wireless noise, and update firmware on both controller and host.
Do I need special software to remap buttons and adjust deadzones?
Many controllers offer vendor apps for remapping and profiles; otherwise use Steam Input or your emulator’s input settings to fine‑tune deadzones and sensitivity. Retro Gaming Blog typically pairs vendor apps with Steam Input or emulator settings.
How do I switch a controller between multiple devices without repairing each time?
Use a tri‑mode pad with a 2.4GHz dongle on PC and Bluetooth for mobile; save onboard profiles and label them so you can swap connection modes without repairing. That’s the approach we use in Retro Gaming Blog builds.